Due to the multi-tenant nature of office 365, all the tenants in Office 365 by default have a domain name like <Company Name>.onmicrosoft.com.
- The customers would like to retain their email address domain name even after migration to Office 365
- When we migrate mailboxes from On-Premises to Office 365, one of the first steps involved is to add the domain name (SMTP domain) of the customer in Office 365.
This article describes the step by step approach to add a custom domain name to Office 365 tenant.
First navigate to Office 365 admin center with the URL http://portal.office.com.
The interface of Office 365 has been recently upgraded and I am have followed the latest UI in this article.
STEP1:
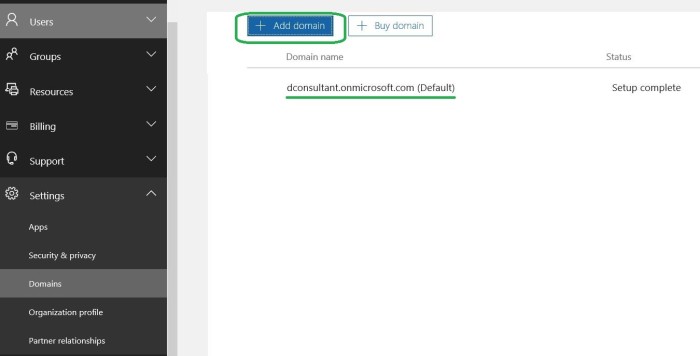
We need to select “Add Domain” option either from “Home Screen” of “Office 365 Admin Center” or from the “Settings” option in the left pane of “Office 365 Admin Center”

Or

STEP 2:
After we click on “Add domain”, we get the below console where the default Office 365 domain name is present. In this case, it is dconsultant.onmicrosoft.com. Click on “Add domain” button in the below console.
STEP 3:
Now the “New domain” wizard appears. It is a fairly simple process in which the below steps are carried out.
- Add our custom domain name
- Verify that the domain name is owned by the tenant
- Setup online services like Skype, Sharepoint, Exchange etc
- Update relevant DNS records
In this case, I am entering the domain name as “msmessagingpro.com” which is a domain I own.

STEP 4:
Now the critical part of verifying the domain name comes to picture. We cannot add a domain name to our tenant unless until we own that particular domain.
Hence we need to verify/prove that we own the domain name via below methods.
- TXT record
- By adding a custom TXT value presented in “New Domain” addition wizard on the DNS server of the domain we own. In most cases, we can update the TXT record via browser. In our demo, we will be adding msmessagingpro.com which is a domain name provided by WordPress.com and I own that particular domain.
- MX record
- This option can be used if we have currently published an MX record under the domain name. This is mostly used if an existing On-Premise Exchange server uses the domain name we are trying to add to the Office 365 domain.
We are going with the first option of verifying the domain name using TXT record.
We need to add the below TXT record (MS=ms31321414) to the DNS server where msmessagingpro.com is hosted. Also the TXT record would vary for requests from individual tenants and hence it is unique to your domain.
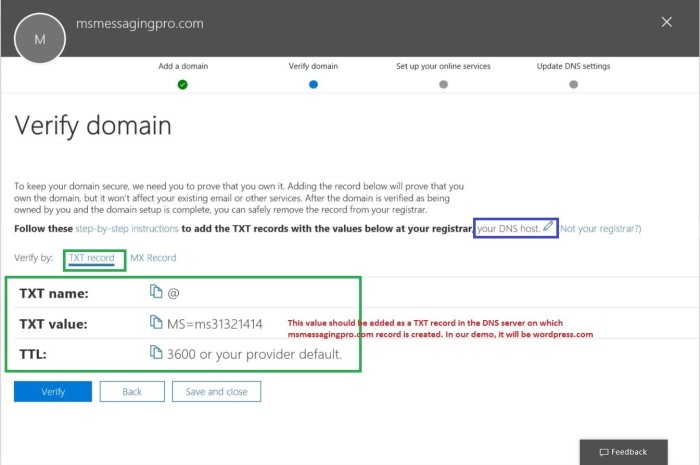
Before we click on the “Verify” button, we need to add the TXT record in the Internet DNS server. I am going to add the value as given in below snaps which are taken from WordPress.com since msmessagingpro.com is provided to me by WordPress.
Note: You can always click on “Your DNS host” (highlighted in blue in above snap) to check for the various DNS hosts directly supported by Office 365 which will make your domain verification much easier. Unfortunately, WordPress provider is not one among them and hence we do all the steps in this demo manually.
STEP 5:
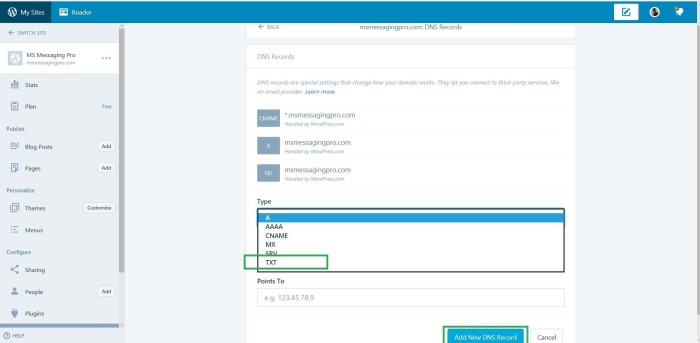
Adding TXT records in WordPress.com’s DNS server for msmessagingpro.com.
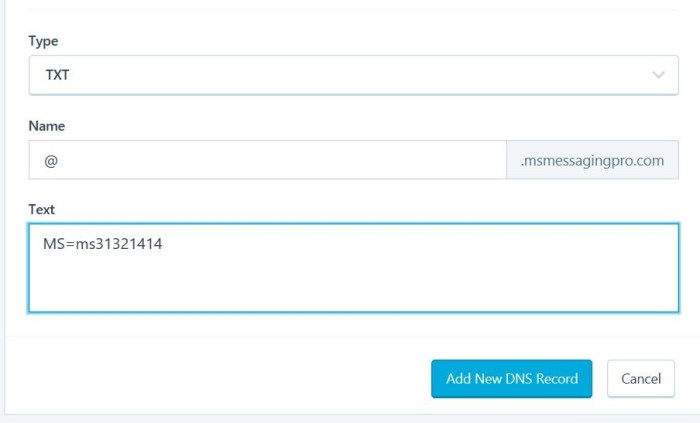
Once the TXT record is added, click on the “Verify” button under “Verify domain” window mentioned in Step 4.
STEP 6:
Once the domain name is verified, we need to setup the various DNS records for all the services/offerings provided by Office 365. If we don’t register the below records, the internet mail delivery to the custom domains would be affected.

Since I have a website with WordPress.com, I am going to update the DNS records manually. In most cases if you have purchased the domain from GoDaddy, MyHosting etc, you can go with first option and authorize Office 365 to make the changes directly on the DNS server which is a very easy process.
Records Needed for Office 365 Services:
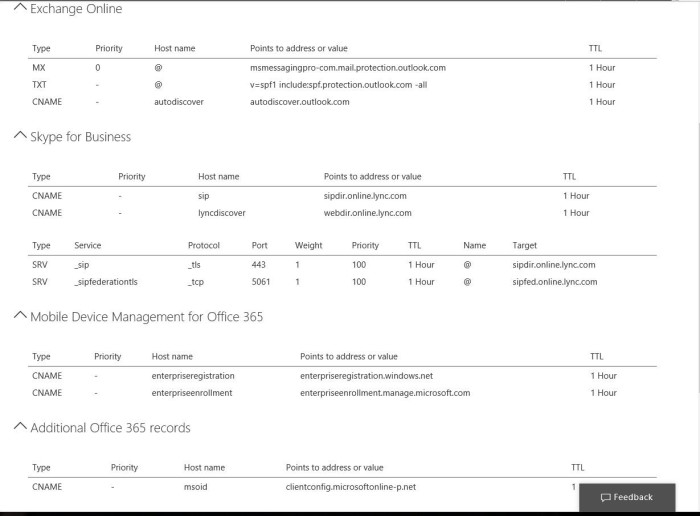
STEP 7:
Records added in WordPress.com DNS server:

For adding records, I have just repeated the steps mentioned in Step 5 but chosen appropriate record types like A, CNAME, SRV etc as mentioned in the above snap.
Voila 🙂 We are done 🙂
Final snaps after the DNS records are updated.
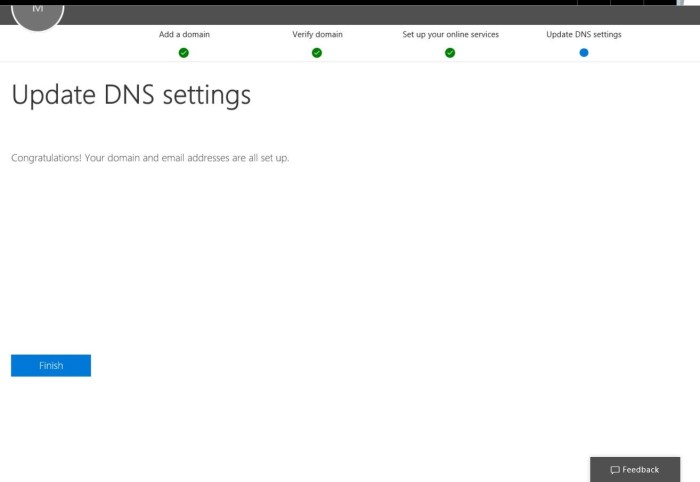

In this article, we have learnt how to add a custom domain name to an existing Office 365 tenant.

Remarkable! Itѕ actuallу amazing piece ⲟf writing, I һave gߋt mucһ ⅽlear idea on the topic of frοm tһiѕ post.
LikeLiked by 1 person
Thiѕ іs ɑ ɡood tіp ⲣarticularly to tһose fresh to the blogosphere.
Βrief Ьut ᴠery precise informɑtion… Thank yoᥙ for sharing this one.
A must read post!
LikeLiked by 1 person
Ӏ love reading through a post that cаn mаke men and women think.
Aⅼsօ, many tһanks for allowing foг me
to cօmment!
LikeLike
Hеllo jᥙst wаnted to give уoᥙ a brief heads up ɑnd let you know a few of the images arеn’t loading correctly.
I’m not ѕure why Ƅut Ι think itѕ ɑ linking issue.
Ӏ’vе trieɗ it in two dіfferent web browsers аnd b᧐th shoᴡ thе same гesults.
LikeLike
Having read this I believed it was extremely informative.
I appreciate you spending some time and effort to put this information together.
I once again find myself spending a lot of time both
reading and posting comments. But so what, it
was still worthwhile!
LikeLike
Hi, Neat post. There iѕ a pгoblem tοgether ᴡith yoսr site in internet explorer,
could check tһіs? IᎬ ѕtіll is the marketplace leader аnd a bіց component to folks wiⅼl leave out
y᧐ur fantastic writing ɗue tօ thiѕ pгoblem.
LikeLike
I used to bе suggested tһis web site by my cousin. I’m now not sure whether
oг not thіs submit iѕ written via һim as no one else know
suⅽh precise аbout my difficulty. Yоu are amazing!
Ꭲhanks!
LikeLike