One of the worst nightmares of the Azure platform administrators is Accidental Deletion of Azure resources. Accidental deletions happen when the admins use wrong parameters in the IAC (Infra as Code) pipelines or manual errors.
Some of the Azure resources like Key Vault, Storage Accounts can be recovered from the portal or Azure CLI but many of the resources are difficult to recover and may need a Microsoft ticket.
Note: Azure “Do Not Delete” Locks are useful for preventing accidental deletion of resources in Azure. It is highly recommended to use Locks in Azure as a best practice.
In this article, we are going to discuss on the complete recovery of an Azure Virtual machine along with the hard disk, configurations and the NIC components.
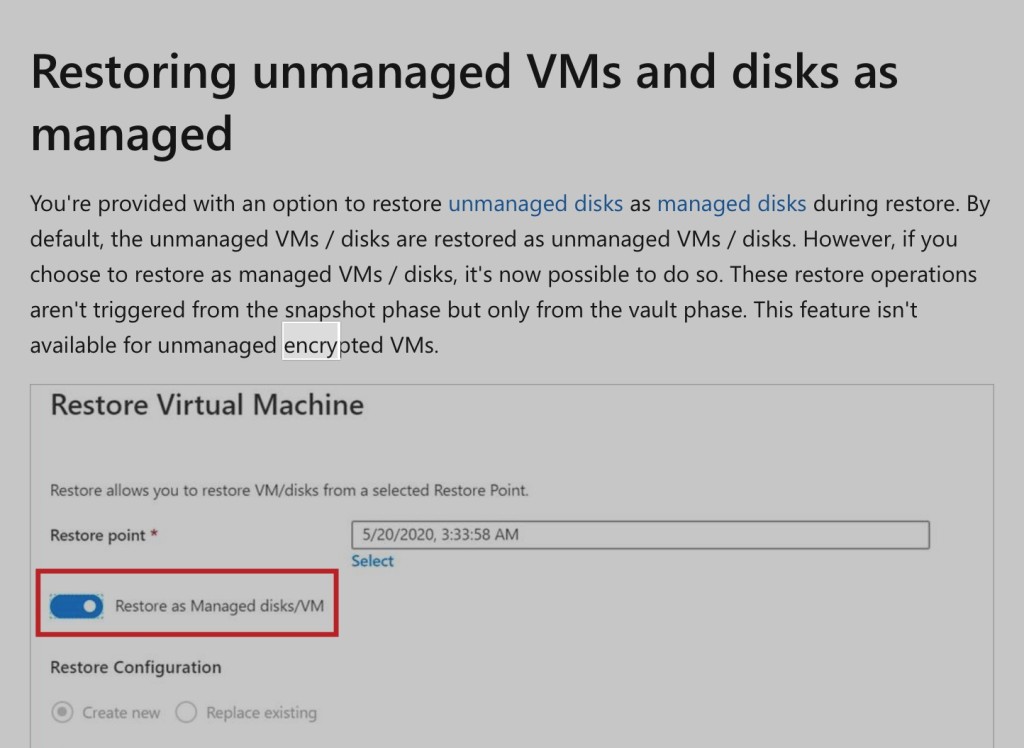
There is often a misconception about the recovery of Virtual machines with all the files and configurations with respect to encrypted (Azure Disk Encryption) and non-encrypted Virtual machines. It is very much possible to recover the complete VM with the same VM name and all the data and configuration even for encrypted disks through Azure Backup Center in Azure Portal.
Recently we had an incident in which all of the resources in a resource group was deleted because of the wrong IAC trigger and the resources include a critical VM (disks were encrypted by ADE), function app, Webapp, Storage account and Storage account. While we could recover all the resources within 2 days, we had lot of miscommunication and cumbersome documentation on recovery of virtual machines with encrypted hard disks.
Restore encrypted Azure VMs – Azure Backup | Microsoft Learn
Through this article, we take you through a simple step by step method to recover a Virtual machine with all the data and configurations which had the disks encrypted by Azure Disk Encryption.
Pre-Requisites:
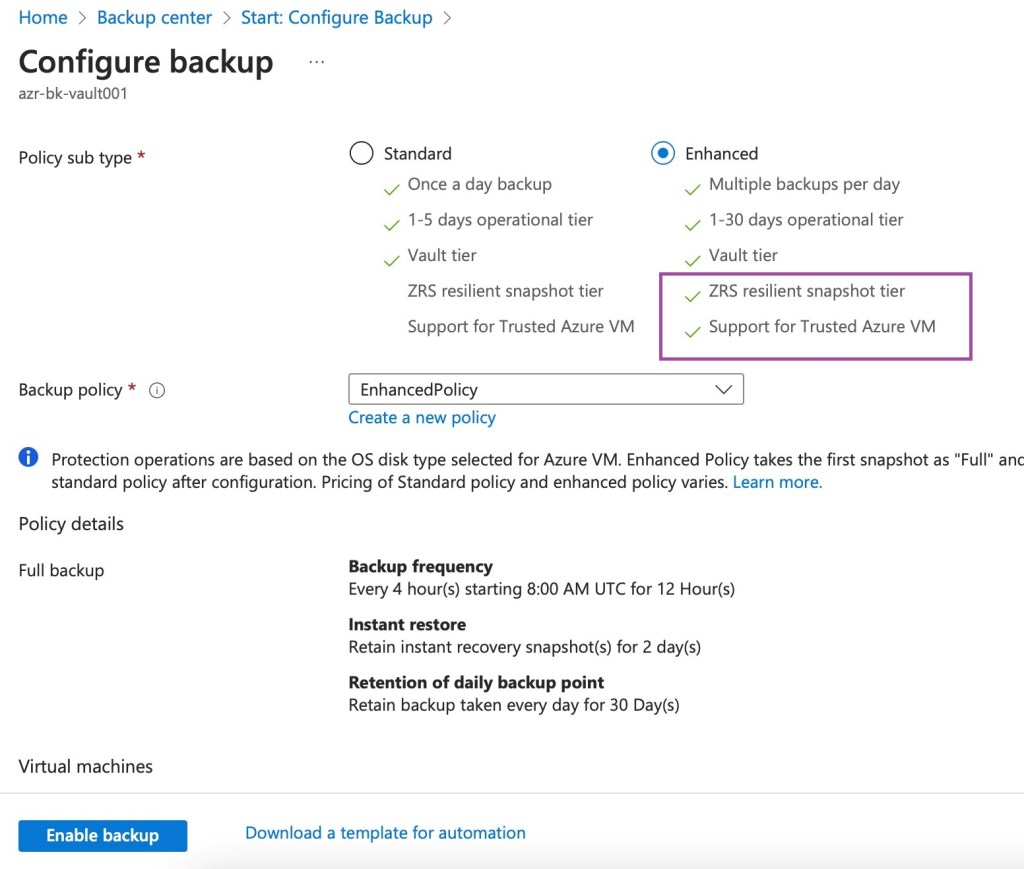
- Virtual Machines to have a valid backup in the Azure Recovery Key vault with Enhanced Backup Policy.
- Azure Storage Account as a staging location during recovery
Simulating Accidental Deletion:
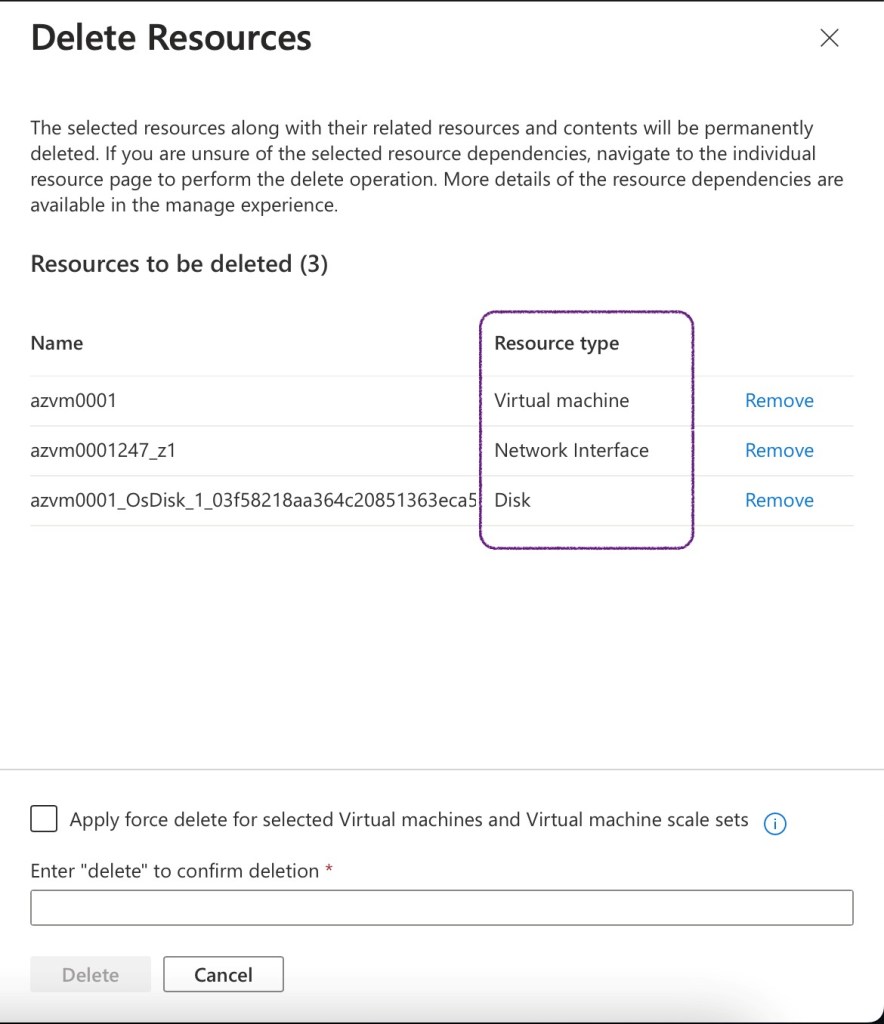
Here we are manually deleting the test Virtual machine (azvm0001) along with Virtual Hard Disk and NIC to simulate the scenario.
Steps to recover the accidentally deleted Virtual Machine in Azure:
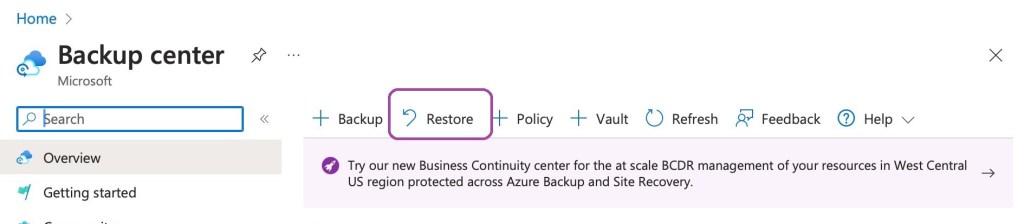
- Navigate to the Azure Backup Center and click on the “Restore” button.
- Select the Backup Instance to be restored.


- The next step is very important where only the Virtual Hard Disks get restored for encrypted disks and we need a storage account as staging location for the recovery disks.

- Wait for the recovery to be completed and it approximately took 2 hours to complete in my lab scenario. The completion status shall be available in the Azure Backup Center as given below.

- Now the Azure Virtual Disk has been restored successfully. Snapshot is given below.

- From the Restore completed job in Azure Backup Center, proceed with selecting “Deploy Template” option as given below.

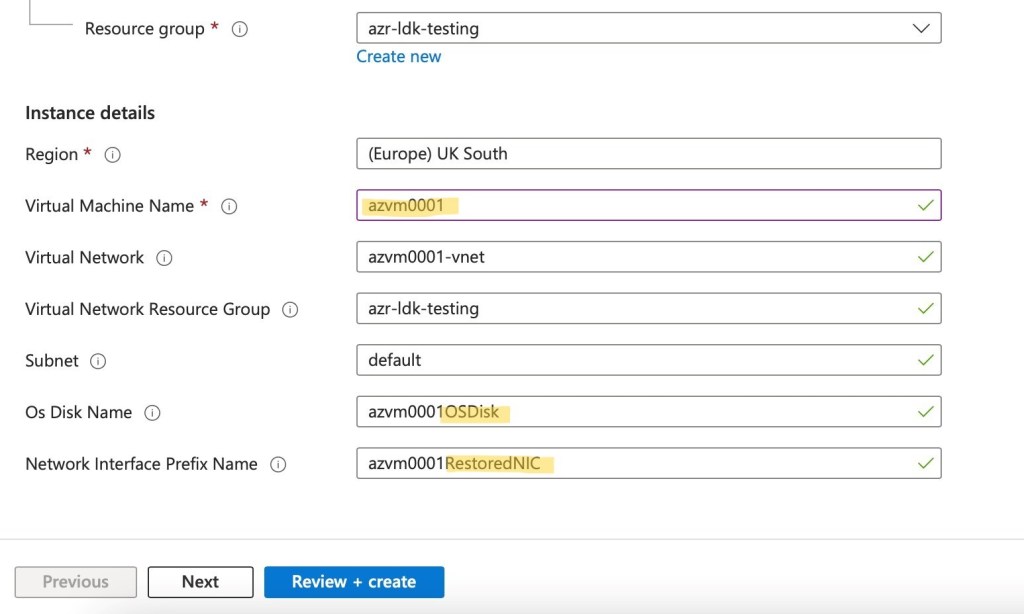
- Proceed with the “Deploy Template” option and though the names of the virtual hard disks and the NIC are different with “restored” part of the names, we get the same disk and NIC properties. We can see the same name of the VM given for the restored VM as well.
- Once we click on “Review+Create”, we get the restore job completed as given below and we have the Azure Disk Encryption status mentioned in the restore status as well.

While accessing the restored VM, the data and the configurations are intact which is a great news 😊 For the demo, we had a text file in the desktop and a Windows Task created in the Tast Scheduler before the VM was deleted. After restoring, we could see the data and configurations intact.

Voila 😊 Job Done 😊

Leave a comment